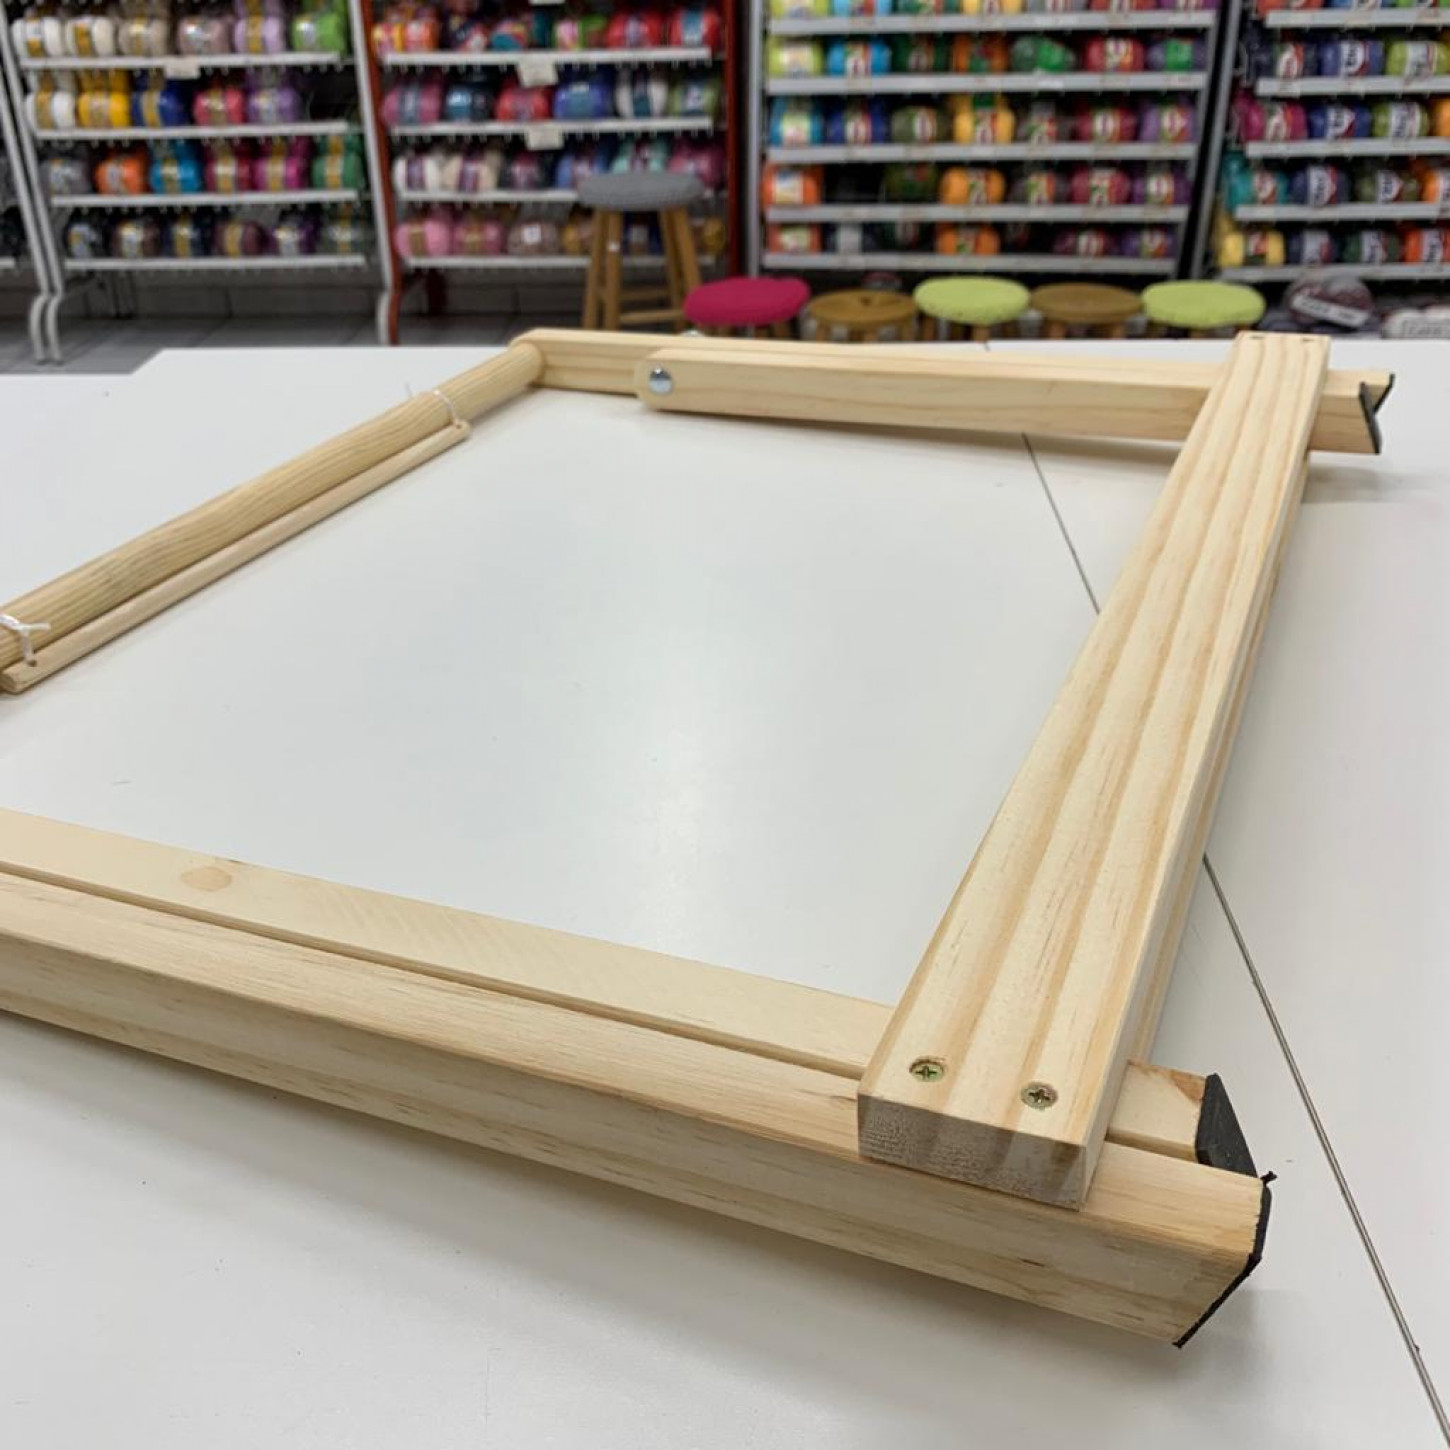
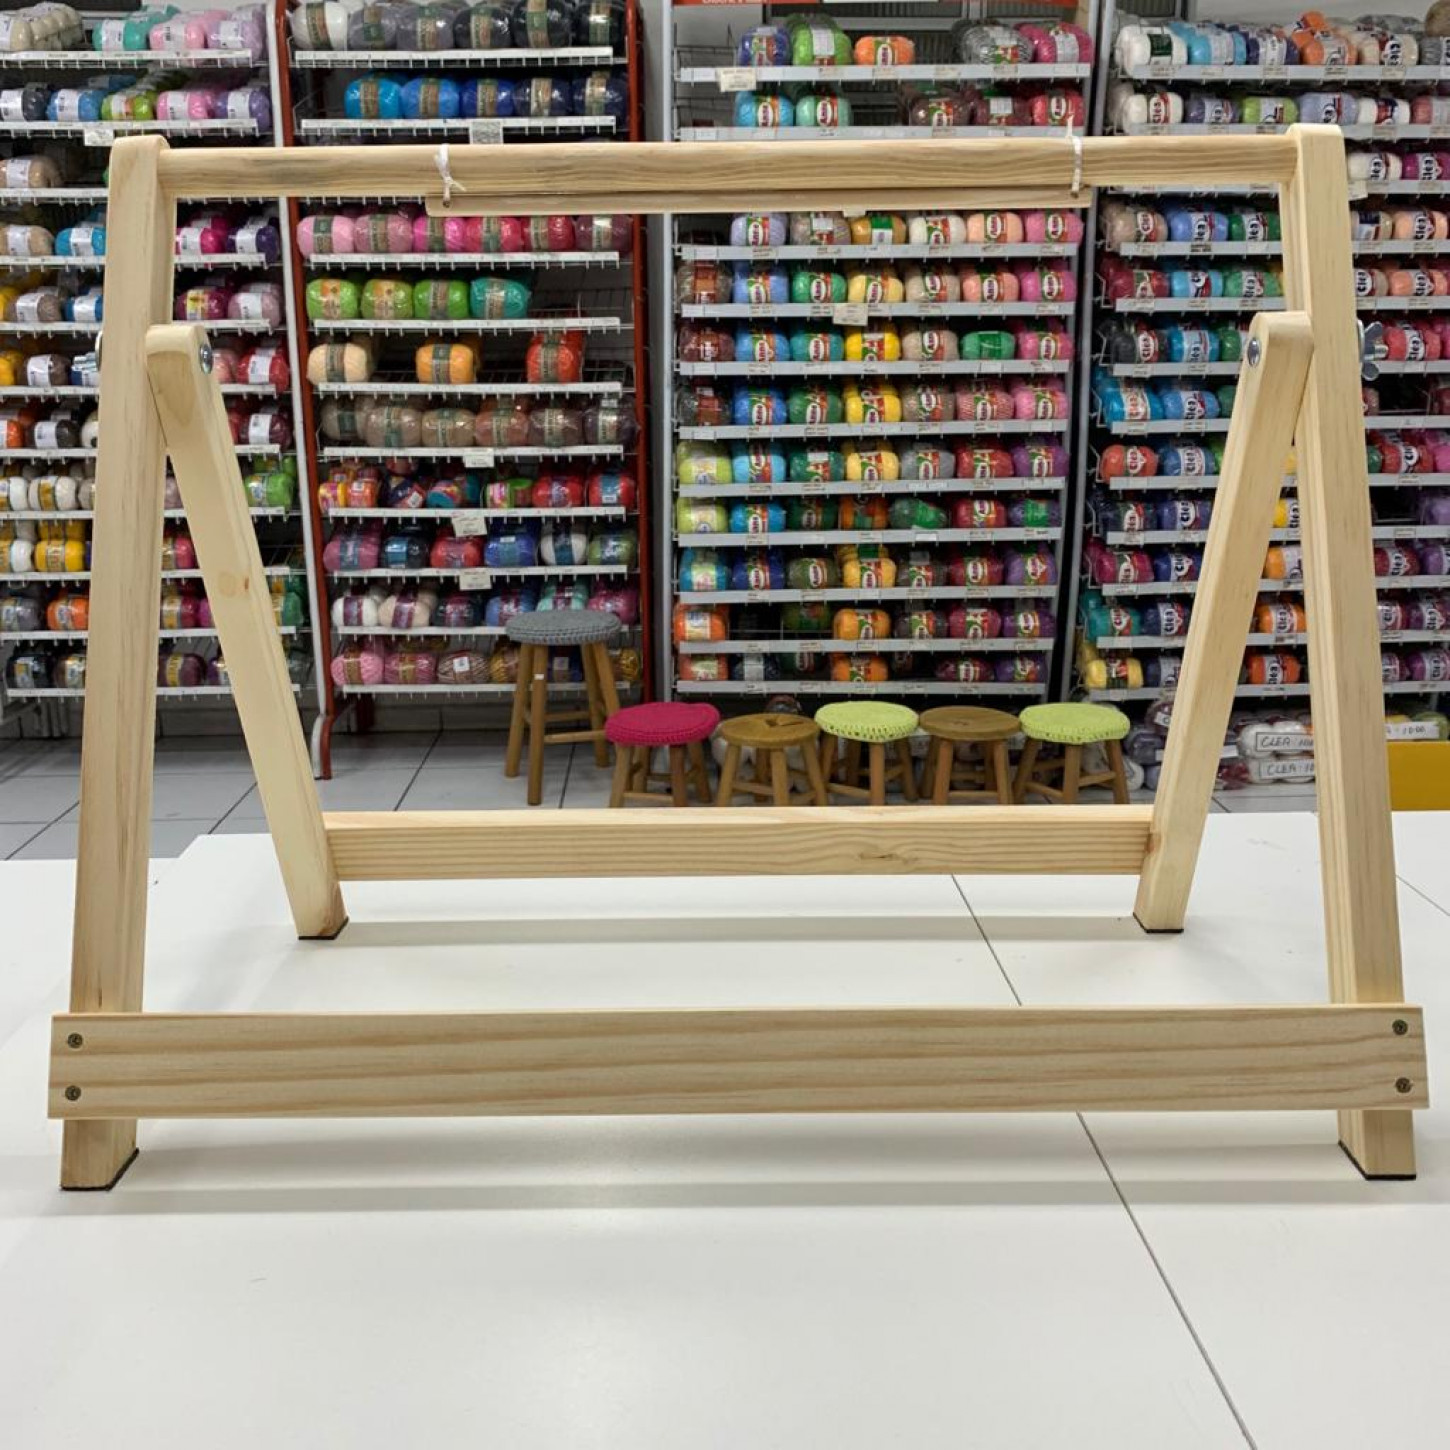
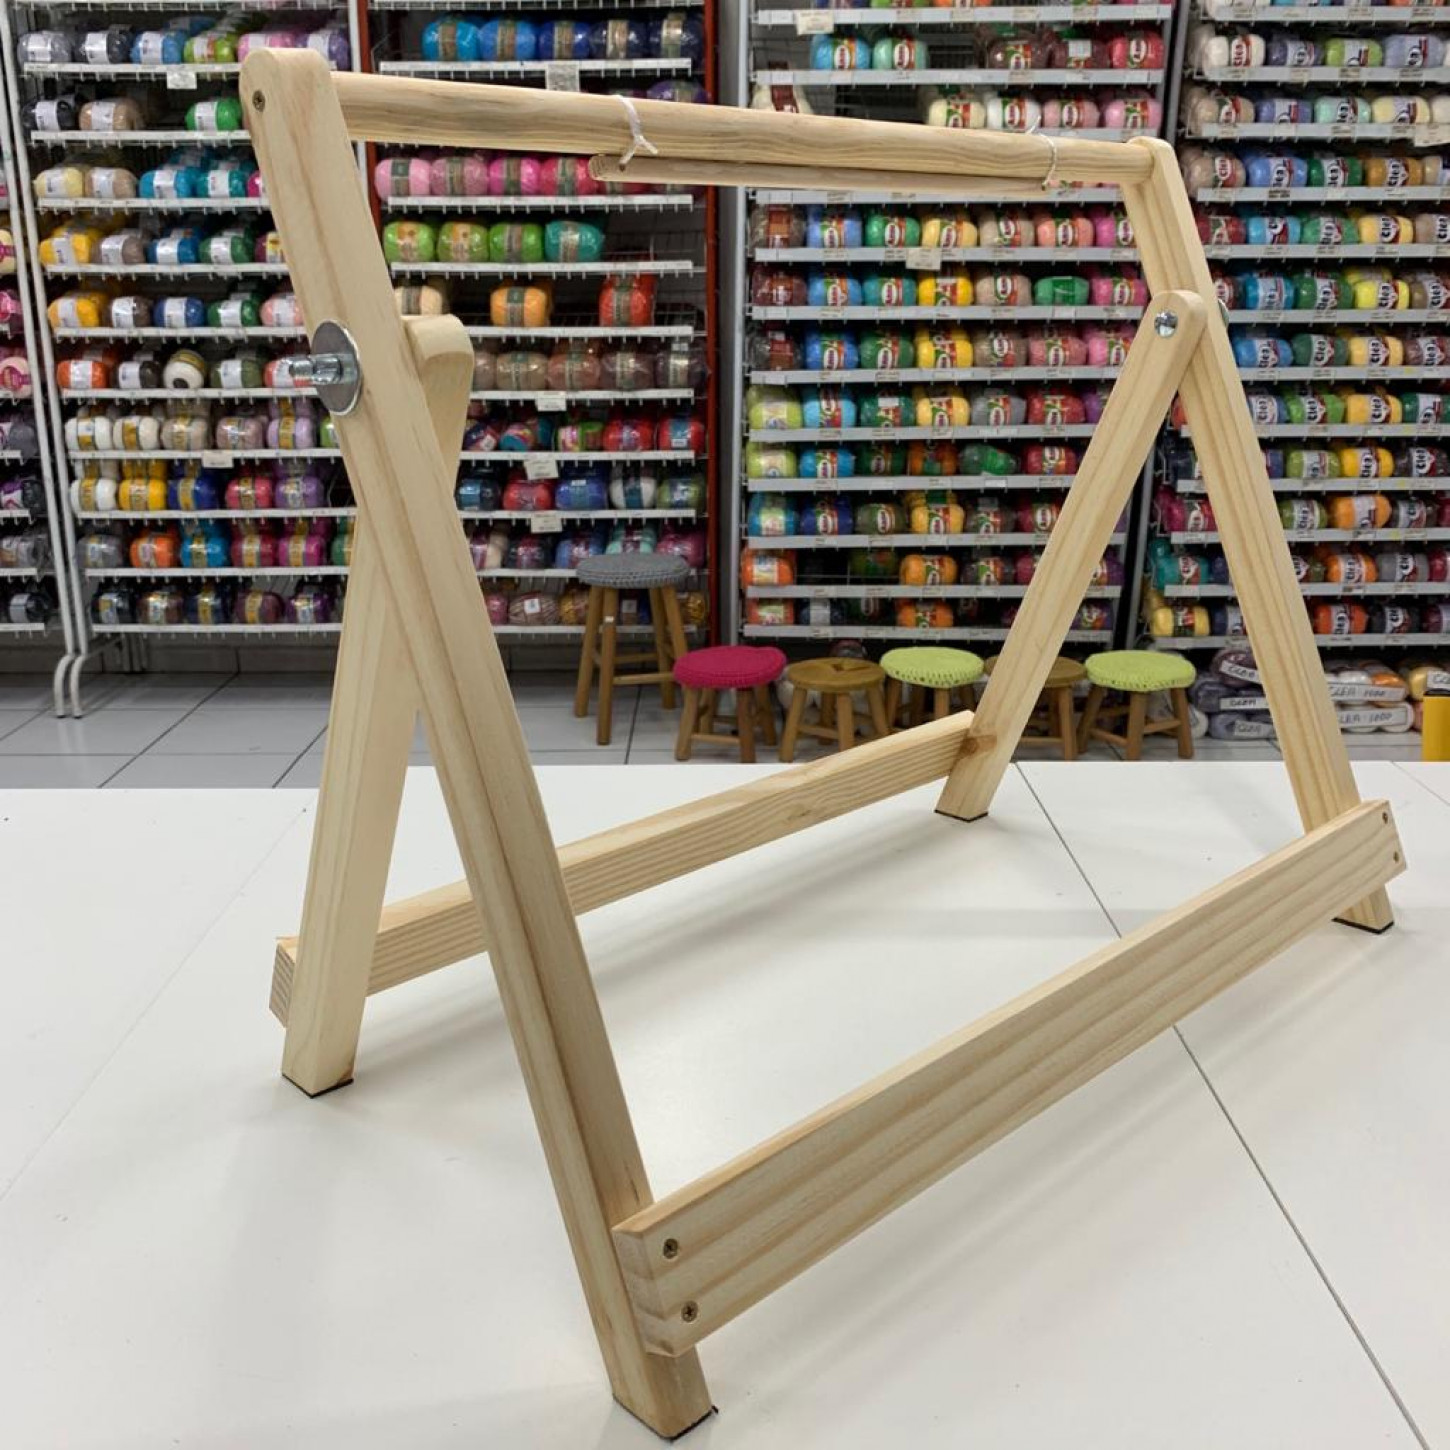
Tear para Macramé
30/jul/2020 - Explore a pasta "macrame e tear" de Yara Ferreira dias no Pinterest. Veja mais ideias sobre macramé, tutorial de macramé, tear de tricô.

Tear de moldura rectangular By Angie Macrame & Fiber Art
Step 3: Submerge Your Feathers. Submerge your feathers into the mixture and allow them to soak for at least 5 minutes. This will ensure they get completely saturated with the starch mixture, essential for stiffening. Don't worry if your mixture gets thick- add more water as needed.

Tear para Macramé
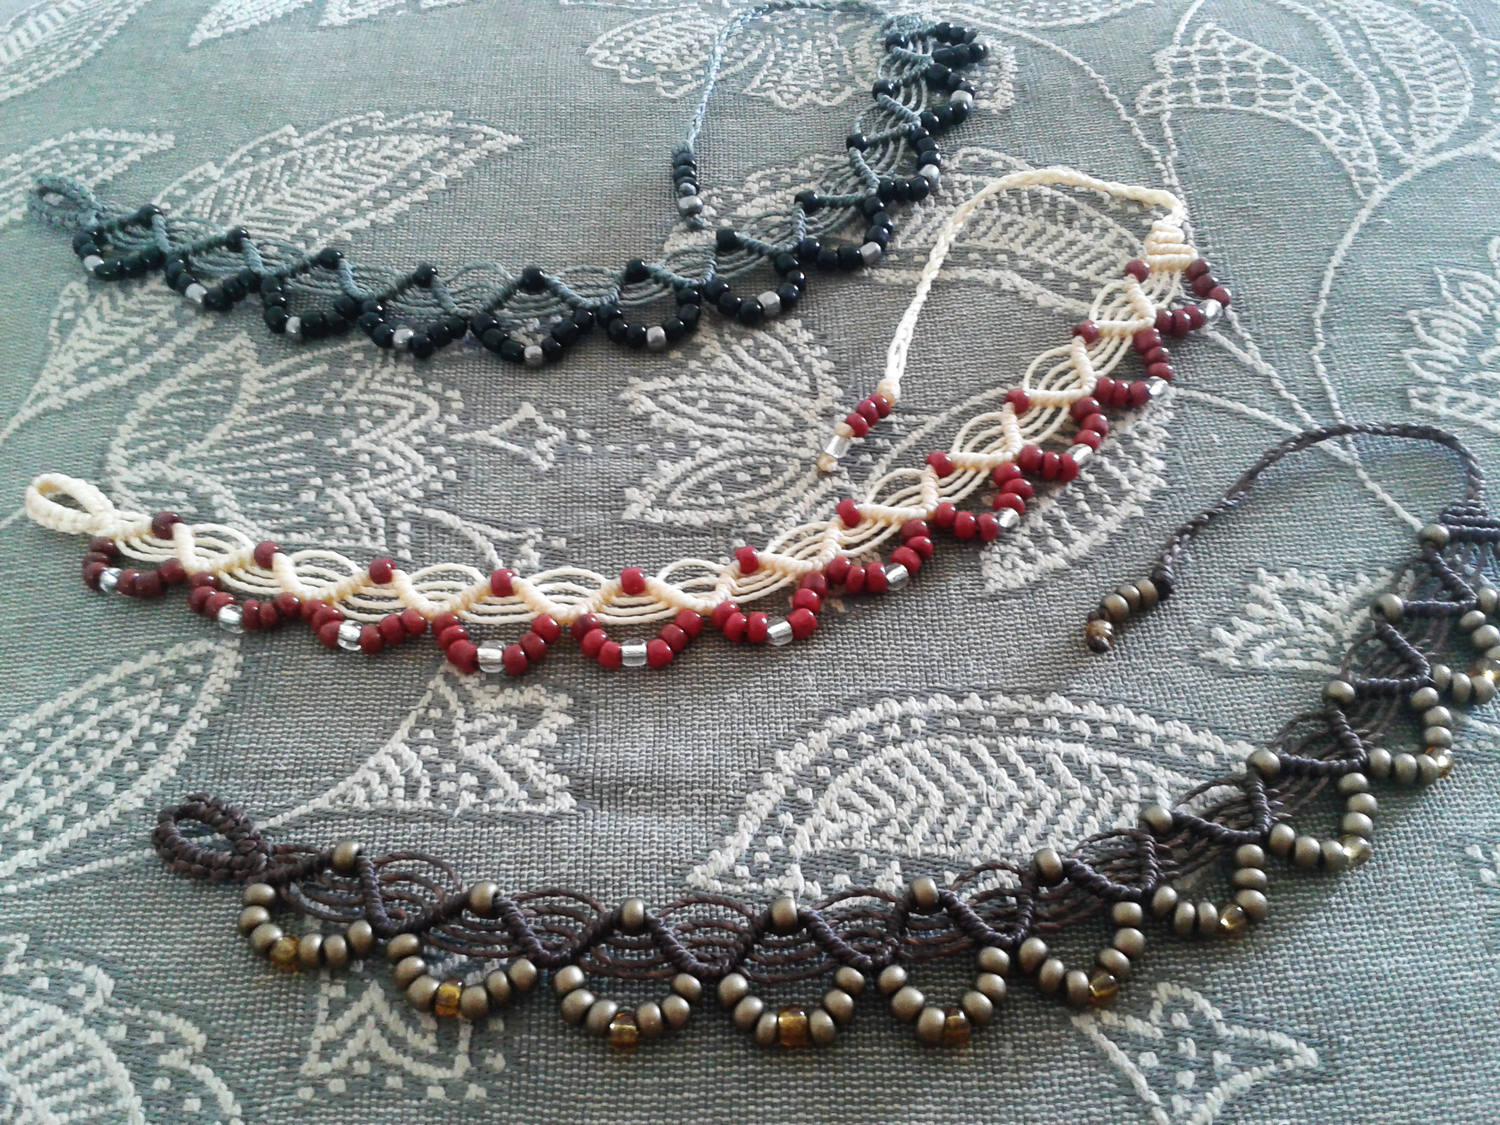
There are free macrame patterns for traditional macrame items like plant hangers and wall hangings, as well as some unique items like trivets, keychains, table runners, curtains, and even chairs and chandeliers. Use these basic macrame knots to make these projects today. 01 of 21.

É facil ser feliz artesanais Peças artesanais em macramê e tear
5/out/2023 - Explore a pasta "Tear & Macrame" de Andressa Rez no Pinterest. Veja mais ideias sobre tapeçarias de macramé, artesanato, macramé.

Meu artesanato,minha terapia 2 TEAR PARA MACRAMÉ!!!!!!!
Nesse vídeo eu faço junto com vocês o nosso famoso tear de pregos! Eu já tinha mostrado aqui no canal, mas vocês pediram muito um vídeo fazendo! Esse tear é.
Tear para Macramé
Here's why: 1 - Most beautiful Macrame projects you see online are created with just three basic knots, which are super easy to learn! 2 - Once you know the basic knots, you can create anything your heart desires: wall hangings, plant hangers, bags, Christmas decorations, earrings, keychains, and more!

Pin de Miriam Sanches em Tear e Macramê em 2020 Tear, Macramê
lindo, fÁcil e delicado, venha aprender o ponto macramÊ no tear de pregos. divirtam-se!

Tear Kumihimo para Fazer Pulseiras de Macramê Tear Elo7
faça você mesmo este tear para macramê. fácil e econômico.

Pin de Miriam Sanches em Tear e Macramê Tear, Macramê
5 Basic Macrame Knots to Learn. 1. Lark's Head. First, fold your sting in half, creating a loop. Next, fold the loop over your stick so that the tails are in the front and the loop is in the back. Now you will put the to tails through the loop in the back, pulling it tight to secure the cord to the stick. 2.

Painel tear de macramê no Elo7 Arte na Janela (F0D4DA)
Check out our tear drop macrame selection for the very best in unique or custom, handmade pieces from our patterns shops.
Tear para Macramé
Natural 3/4-Inch Wooden Beads with 3/8-Inch Hole$8 for 4. "You can find lots of beautiful beads, but they're not always in the right millimeter or diameter," explains Gabrielle. Instead, he.

TEAR DE PULSEIRA MACRAMÊ Tudo que você precisa saber para criar suas
Paso 2: Aprende los nudos básicos. El macramé se basa en la creación de nudos y trenzas que forman patrones y diseños únicos. Los nudos básicos son el nudo simple, el nudo plano y el nudo festón. Dedica tiempo a practicar estos nudos antes de comenzar tu proyecto.

Meu projeto do curso Macraweave combine macramê com técnicas de tear
1. Fold one macramé cord in half creating a loop. 2. Place the folded cord on working surface with loop pointing down and ends of cord pointing up. 3. Place your dowel (or ring) on top of the folded cord just above the loop. 4. Pull the loop up over the dowel (or ring). 5.
Curso de Macramê e Tear Manual
Take your first WC, bring it forward, and then around the FC, following the left direction, to create a counter-clockwise loop. Take that same WC over and through the loop you just made. Grab your second WC and repeat the steps on the same FC. Easy Macrame for Beginners - Horizontal Hitch Knot. Diagonal Hitch Knot.

Pin de Miriam Sanches em Tear e Macramê em 2020 Tear, Macramê
Gabarito (tear) para fazer pulseira de macramêDescrição: ️ Nesse vídeo faço uma demonstração de como montar um tear para fazer pulseira de macramê, feito co.

técnica de macramê "Macraweave combine macramê com técnicas de tear
Measure and cut a length of cord. Fold the rope in half. Bring the folded loop up behind the dowel, then forward and down in front of the dowel. With the loop pointing downward, pull the ends of the rope up and through the loop. Pull down on the ends to tighten the knot, making sure both ends are even.